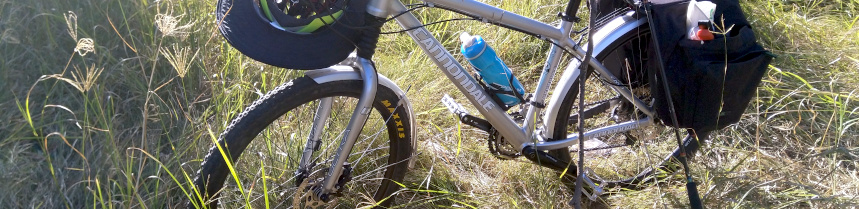

I do love a good bike hack, a kludge, a mashup if you will. Astute readers may have noticed a (perhaps) odd looking saddle bag attached to the seat post of my Bombtrack Beyond+ lately and that thing is one such hack which I recently fashioned from stuff hanging around in my bicycle spare parts storage.
Quite a while ago, I bought a large-ish handlebar bag which, unfortunately, didn’t turn out to be as good as I first thought. It sat a bit strangely on my handlebars, the clamping mechanism didn’t really grip very well and the bag sagged part way through a ride and it was probably really the wrong shape for a handlebar bag. The bag itself, though, is quite good. It’s roomy, well constructed and the compartments are well placed. So, after having it sit around my house for quite a while, I decided to try and repurpose it.
Also sitting around my house was one of those light duty, seat clamped pannier racks that I got from a department store some time ago which had some broken bits at the end of the cargo platform.
And there I had the necessary ingredients for the kludge I was about to concoct. I would turn the handlebar bag into a supported, large saddle bag that I could clamp to my seat post.
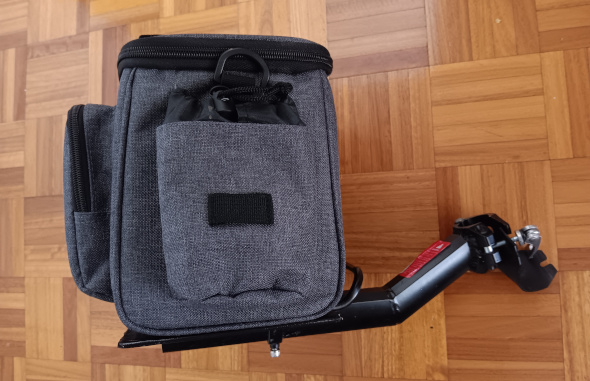
First I hack sawed the broken bits off the end of the pannier rack and filed all the sharp bits down with a metal file. The rack was now quite a bit shorter and really more suitable to being the bag support it was about to become.
Next, it was time to attach the handlebar bag. I wanted the bag to be as stable as possible on the rack so I was going to need a way to stiffen the base of the it. Luckily, I had a few pieces of old Dibond signage board sitting around which is a type of board that consists of a layer of foam sandwiched between two sheets of thin aluminium. I could also have substituted the Dibond for any other type of thin, stiff board like marine plywood, for example.

I cut two pieces of the Dibond. One that fits perfectly on the base on the inside of the bag and another slightly larger one that covers the outside of the base of the bag. The base of the bag would now be sandwiched between the two pieces of Dibond and then bolted to the pannier rack. One of the nice things about using Dibond was that, to cut it, all I had to do was score it with a box cutter against a straight edge like a long ruler and then carefully snap it over the edge of a bench.
Again, I filed the sharp bits off the edges of the Dibond and rounded the corners so it couldn’t cut the bag material as the bag was moving around with the bike.
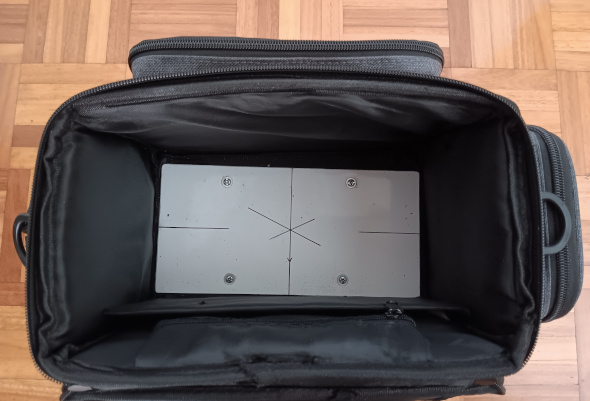
Once I had my Dibond base pieces, it was time to mark out where I would drill the holes for the four M3 bolts that would hold the bag and Dibond to the rack. This was a measure thrice and drill once affair if I wanted to avoid cutting more Dibond and/or having superfluous holes in the base of my bag. My ruler, sharpie and eyeballs didn’t fail me and the bag ended up on the rack well centred (enough) with the four M3 bolts fastened with Nyloc nuts holding it firmly.
The final touch was to wrap some cloth tape to the edges of the outside piece of Dibond to hide any remaining sharp bits and to make it blend in with the bag a bit better.
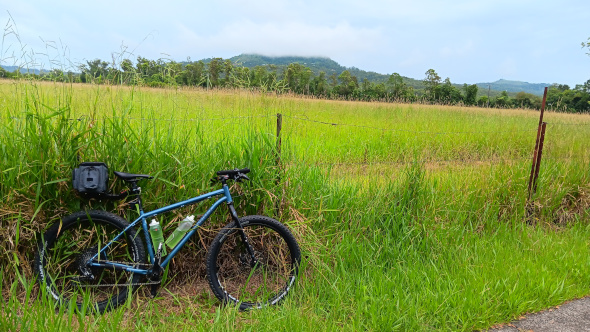
I’ve taken this bag on maybe about half a dozen off-road trips as of this writing including a few long trails full of baby head sized rocks and it’s proven to be totally solid. Not only does it hold all I need for a long day out (or maybe even for a longer trip) but it also acts as a mudguard on those wetter days with the Dibond base copping most of the muck. I haven’t tested it in really heavy rain yet but the bag came with a rain cover so I think between that and the Dibond at the bottom, it should be reasonably waterproof.

Probably the only downside is that the bag and rack are now permanently one unit meaning that I need to clamp it on, load it up and then leave it until the trip is done. No quick releasing which means I can’t leave valuables in it if my bike is locked up somewhere. Probably not a huge deal for the kind of rides I take it on anyway.
It’s not exactly a marvel of modern design but it did put to good use a bag that would probably have just sat around indefinitely and a broken rack that would have been thrown out eventually. I’ve had quite a few good trips with it so far and hope for many more to come.
Hopefully that provides some inspiration if you have any unused bike bits hanging around that might be put to good use again.
Ride safe and see you out there sometime.